Top Outdoor Kitchen Ideas for Every Budget
Outdoor kitchens have become the crown jewel of modern home improvements, transforming ordinary backyards into sophisticated living spaces. Whether you’re working with a modest budget or planning a luxury outdoor oasis, these versatile additions not only extend your living area but can significantly boost your property’s value. From simple grill stations to elaborate cooking and entertainment zones, there’s an outdoor kitchen solution for every homeowner’s vision and budget.
Outdoor Kitchen Design Basics
Creating the perfect outdoor kitchen starts with thoughtful planning and design. The key is striking the right balance between functionality and aesthetics while considering your specific needs and space constraints.
Choosing the Right Location
The success of your outdoor kitchen largely depends on its placement. Consider positioning your kitchen where it’s easily accessible from your indoor kitchen while maintaining a comfortable distance from living areas to manage smoke and cooking odors. Natural factors play a crucial role too—evaluate wind patterns to prevent smoke from blowing into your home or dining area, and consider sun exposure throughout the day to ensure comfortable cooking conditions.
For homes in northern climates, positioning the kitchen where it receives morning sun and afternoon shade can extend its seasonal use. Southern homes might benefit from additional shade structures to make cooking comfortable during peak summer hours.
Layout and Floor Plans
Your outdoor kitchen’s layout should promote efficient workflow while maximizing available space. Each design configuration offers distinct advantages:
The L-shaped layout works exceptionally well for medium-sized spaces, offering a dedicated cooking zone while maintaining an open feel. This design typically requires 150-200 square feet and works well for incorporating a dining area within the space.
U-shaped layouts provide maximum functionality for larger spaces, creating distinct zones for preparation, cooking, and cleaning. These designs typically need 200-300 square feet but offer the most comprehensive outdoor cooking experience.
Island layouts shine in smaller spaces under 150 square feet, providing 360-degree access and excellent flexibility for entertaining. They’re particularly effective when space efficiency is crucial.
Budget-Friendly Outdoor Kitchen Ideas
Creating an inviting outdoor kitchen doesn’t require a fortune. Smart planning and strategic choices can help you build an attractive and functional space without breaking the bank.
Simple BBQ Grills and Basic Fixtures
Start with a quality freestanding grill as your centerpiece. Modern freestanding grills offer excellent value, with many featuring side burners and storage space. While built-in grills might be the dream, a well-chosen freestanding unit can provide comparable cooking performance at a fraction of the cost.
Consider a modular approach to your kitchen setup. Begin with essential elements like a grill and prep surface, then add features over time as your budget allows. This approach helps manage initial costs while leaving room for future improvements.
Cost-Effective Materials for Outdoor Kitchens
Concrete countertops offer remarkable durability and style at an affordable price point. When properly sealed, they withstand weather excellently and can be customized with different colors and finishes. For flooring, consider stamped concrete or outdoor-rated porcelain tiles, which provide durability and style without the high cost of natural stone.
Wooden cabinetry, when properly treated for outdoor use, can offer significant savings compared to stainless steel alternatives. Cedar and teak naturally resist weather and insects, making them excellent choices for budget-conscious homeowners.
Mid-Range Outdoor Kitchen Ideas
Mid-range outdoor kitchens blend quality and functionality, incorporating more permanent fixtures and specialized cooking equipment without reaching luxury price points.
Adding a Pizza Oven or Smoker
A pizza oven can transform your outdoor kitchen into a genuine culinary destination. Modern prefabricated pizza ovens offer excellent performance while costing significantly less than custom-built brick ovens. Position your pizza oven away from main traffic areas, as they require proper clearance for safety and heat management.
Smokers add versatility to your outdoor cooking arsenal. Consider vertical smokers for smaller spaces or offset smokers if you frequently cook for larger groups. Many modern smokers include temperature control features that make smoking meats more approachable for beginners.
Upgrading to Stainless Steel Appliances
Investing in stainless steel appliances marks a significant upgrade in both functionality and durability. Focus on grade-304 stainless steel for the best balance of durability and cost. Key upgrades might include:
A built-in grill with higher BTU output and better heat control A compact outdoor refrigerator for beverages and ingredients A stainless steel sink with cold water connection
Luxury Outdoor Kitchen Ideas
Luxury outdoor kitchens represent the pinnacle of outdoor living, incorporating professional-grade appliances and premium materials throughout the space.
High-End Built-In Grills and Outdoor Refrigerators
Premium built-in grills from manufacturers like Lynx, DCS, or Wolf offer restaurant-quality cooking capabilities. Look for features like:
Infrared searing stations for steakhouse-quality results Rotisserie systems with dedicated burners Smart temperature monitoring and control Specialized smoking drawers
Full-size outdoor refrigerators with freezer compartments keep ingredients fresh and beverages cold. Wine coolers and ice makers can be integrated for comprehensive beverage service.
Custom Bars, Fire Pits, and Entertainment Areas
Incorporate a fully equipped bar with refrigerated drawers, wine storage, and a beer tap system. Stadium-style LED lighting can illuminate work surfaces while creating ambiance. Consider adding a pergola with a louvered roof system for year-round comfort.
High-end entertainment features might include:
Weather-resistant 4K TVs with surround sound Custom fire features that double as dining areas Climate control systems for consistent comfort
Outdoor Kitchen Accessories and Features
The right accessories enhance functionality and convenience across all budget levels.
Outdoor Lighting and Heating
Layer your lighting for both functionality and atmosphere:
Task lighting over cooking and prep areas Ambient lighting for dining spaces Path lighting for safety Under-counter LED strips for visual interest
For heating, consider:
Overhead infrared heaters for targeted warmth Built-in gas heaters integrated into walls or columns Portable propane heaters for flexibility
Storage Solutions for Outdoor Kitchens
Weather-resistant storage solutions protect your investment and keep essentials organized:
Pull-out trash and recycling bins Sealed drawers for utensils and tools Dedicated fuel storage for grills and smokers Weatherproof cabinets for cleaning supplies
DIY Outdoor Kitchen Ideas
Taking the DIY approach can significantly reduce costs while creating a personalized outdoor cooking space.
Building Your Own Grill Station
Create a custom grill station using concrete blocks or metal studs as the base structure. Face it with stone veneer or tile for a professional look. Include proper ventilation and non-combustible materials behind and around the grill.
DIY Countertops and Shelving
Pour your own concrete countertops using melamine forms and concrete mix designed for countertops. Add glass fiber reinforcement for additional strength. For shelving, consider using pressure-treated lumber sealed with marine-grade finishes or aluminum brackets with cedar planks.
Maintenance Tips for Outdoor Kitchens
Regular maintenance ensures your outdoor kitchen remains functional and attractive for years to come.
Protecting Your Outdoor Kitchen from the Elements
Invest in quality covers for all appliances and furniture. Apply appropriate sealants to countertops and natural stone surfaces annually. Consider installing a roof or pergola over the entire kitchen area for maximum protection.
Routine Cleaning and Care
Establish a regular maintenance schedule:
Deep clean grills and smokers monthly Inspect and clean burners every three months Check and tighten gas connections twice yearly Clean and reseal natural stone surfaces annually Test refrigeration temperatures weekly during peak season
Conclusion
Creating your ideal outdoor kitchen doesn’t require unlimited funds—it requires thoughtful planning and smart choices. Whether you’re starting with a basic grill station or designing a comprehensive outdoor entertainment space, focus on quality materials and proper installation to ensure longevity. Remember that your outdoor kitchen can evolve over time, allowing you to start with essential elements and add features as your needs and budget allow. The key is creating a space that enhances your lifestyle while providing years of enjoyment for family and friends.
Transforming Your Backyard: The Ultimate Guide to Outdoor Living
In recent years, the concept of outdoor living has gained tremendous popularity among homeowners. No longer content with confining their living spaces to the indoors, people are increasingly looking to their backyards as an extension of their homes. This shift in perspective has led to a revolution in how we view and utilize our outdoor spaces, transforming them from simple lawns into functional, comfortable, and stylish living areas.
The Rise of Outdoor Living
The trend towards outdoor living spaces has been driven by several factors:
- A desire for more living space without the need for costly home additions
- An increased focus on health and wellness
- The appeal of entertaining and socializing in fresh air settings
- A growing appreciation for nature and sustainable living practices
By reimagining your backyard, you can create a personal oasis that not only enhances your quality of life but also adds significant value to your property.
Enhanced Home Value: The Financial Benefits of Outdoor Living Spaces
Investing in your outdoor space is not just about creating a beautiful and functional area for your enjoyment; it’s also a smart financial decision. Well-designed outdoor living areas can significantly boost your property’s value, making them an attractive feature for potential buyers if you ever decide to sell.
Key Outdoor Features That Increase Home Value
- Patios and Decks: These structures provide a solid foundation for outdoor living and can offer returns of up to 80% on investment.
- Outdoor Kitchens: A fully equipped outdoor kitchen can recoup 100% to 200% of its cost.
- Fire Pits or Fireplaces: These features add warmth and ambiance, potentially increasing home value by 15-40%.
- Professional Landscaping: A well-maintained landscape can add 5-12% to your home’s value.
Feature | Potential ROI |
---|---|
Patio/Deck | Up to 80% |
Outdoor Kitchen | 100-200% |
Fire Pit/Fireplace | 15-40% increase in home value |
Professional Landscaping | 5-12% increase in home value |
It’s important to note that the exact return on investment can vary depending on factors such as your location, the quality of the installation, and current real estate market conditions. However, the overall trend shows that outdoor living spaces are highly valued by homebuyers and can significantly enhance your property’s appeal and worth.
Increased Living Space: Bringing Indoor Comforts Outside
One of the most compelling reasons to invest in outdoor living is the opportunity to expand your usable living space without the need for costly home additions. By extending indoor comforts to your backyard, you can create seamless transitions between your interior and exterior spaces, effectively doubling your living area during favorable weather conditions.
Ideas for Extending Your Living Space Outdoors
- Alfresco Dining Areas: Create an outdoor dining room complete with a table, comfortable seating, and mood lighting for memorable meals under the stars.
- Outdoor Living Rooms: Design a cozy seating area with weather-resistant furniture, throw pillows, and an outdoor rug to mimic the comfort of your indoor living room.
- Covered Patios or Pergolas: These structures provide shade and protection from the elements, allowing you to enjoy your outdoor space even on hot or rainy days.
- Outdoor Home Offices: With the rise of remote work, consider creating a peaceful outdoor workspace to boost productivity and enjoy nature simultaneously.
- Outdoor Media Centers: Install a weatherproof TV and sound system for movie nights or game day parties in the fresh air.
By thoughtfully designing these outdoor spaces, you can create functional areas that serve as natural extensions of your home, blurring the lines between indoor and outdoor living.
Health and Wellness Boost: The Benefits of Outdoor Living
Embracing outdoor living isn’t just about aesthetics or property value; it also offers significant health and wellness benefits. Spending time in your backyard can positively impact both your physical and mental well-being.
Physical Health Benefits
- Increased Vitamin D: Sunlight exposure helps your body produce vitamin D, essential for bone health and immune function.
- Improved Air Quality: Outdoor spaces typically have better air circulation and lower concentrations of indoor pollutants.
- Enhanced Physical Activity: Having an inviting outdoor space encourages more movement and exercise.
Mental Health Benefits
- Stress Reduction: Time spent in nature has been shown to lower cortisol levels, reducing stress and anxiety.
- Improved Mood: Exposure to natural light and greenery can boost serotonin levels, enhancing overall mood.
- Better Sleep: Regular outdoor time can help regulate your circadian rhythm, leading to improved sleep quality.
Health Benefit | Description |
---|---|
Vitamin D Boost | Sunlight exposure promotes vitamin D production |
Stress Reduction | Nature exposure lowers cortisol levels |
Improved Air Quality | Better circulation and fewer indoor pollutants |
Enhanced Mood | Natural light and greenery boost serotonin levels |
Better Sleep | Outdoor time helps regulate circadian rhythms |
By creating an inviting outdoor living space, you’re not just adding value to your home; you’re investing in your health and well-being.
Entertainment Potential: Hosting Memorable Gatherings
One of the most exciting aspects of outdoor living is the enhanced entertainment potential it offers. A well-designed outdoor space can serve as the perfect backdrop for gatherings of all sizes, from intimate family dinners to larger social events.
Ideas for Outdoor Entertainment Spaces
- Barbecue and Grilling Stations: Install a high-quality grill or even a full outdoor kitchen to become the ultimate host for cookouts and barbecues.
- Fire Pits and Fireplaces: These features create a cozy focal point for evening gatherings, perfect for roasting marshmallows or enjoying drinks with friends.
- Outdoor Bar Areas: Set up a dedicated bar space for mixing cocktails and serving drinks, keeping the party outside and reducing indoor foot traffic.
- Game Zones: Incorporate areas for outdoor games like horseshoes, cornhole, or even a putting green for active entertainment.
- Multi-level Decking: Create distinct zones for different activities, such as dining, lounging, and mingling, to accommodate various guest preferences.
- Water Features: Add ambiance with a fountain, pond, or even a small waterfall to create a soothing backdrop for conversations.
By thoughtfully designing your outdoor space with entertainment in mind, you can create a versatile area that’s perfect for hosting everything from casual get-togethers to more formal events.
Personalized Leisure Spaces: Tailoring Your Outdoor Area to Your Hobbies
Your outdoor living space should be a reflection of your personal interests and hobbies. By customizing your backyard to accommodate your favorite activities, you can create a truly unique and functional space that enhances your daily life.
Ideas for Hobby-Specific Outdoor Spaces
- Meditation and Yoga Zones: Create a serene corner with a flat surface for yoga mats, surrounded by calming plants and perhaps a small water feature for meditation.
- Gardening Areas: Dedicate space for raised beds, a greenhouse, or a potting station to indulge your green thumb.
- Artist’s Studio: Set up an easel and storage for art supplies in a shaded area for outdoor painting sessions.
- Reading Nooks: Install a comfortable hammock or a cozy bench surrounded by lush greenery for a perfect outdoor reading retreat.
- Outdoor Gym: Designate an area for weather-resistant exercise equipment or create a space for bodyweight workouts and yoga.
- Stargazing Spot: Include comfortable seating and perhaps a telescope for nighttime sky watching.
Hobby | Outdoor Space Idea |
---|---|
Meditation/Yoga | Serene corner with flat surface and water feature |
Gardening | Raised beds, greenhouse, or potting station |
Art | Shaded area with easel and supply storage |
Reading | Hammock or bench in a green, quiet spot |
Fitness | Weather-resistant equipment or bodyweight workout area |
Astronomy | Comfortable seating with space for telescope |
By tailoring your outdoor space to your interests, you create opportunities to engage in your favorite activities while enjoying the benefits of fresh air and natural surroundings.
Aesthetic and Sustainable Practices: Beautifying Your Space Responsibly
Creating a beautiful outdoor living space doesn’t have to come at the expense of the environment. By incorporating sustainable practices and eco-friendly design elements, you can craft an aesthetically pleasing backyard that also contributes positively to the environment.
Landscaping for Beauty and Sustainability
- Native Plants: Choose plants indigenous to your area, which require less water and maintenance while supporting local ecosystems.
- Xeriscaping: Implement water-wise landscaping techniques to reduce water usage without sacrificing beauty.
- Vertical Gardens: Utilize wall space for growing plants, increasing green coverage without taking up ground space.
Water Features for Ambiance and Conservation
- Recirculating Fountains: Add the soothing sound of water while minimizing water waste.
- Rain Gardens: Create beautiful planted areas that also help manage stormwater runoff.
- Rainwater Harvesting Systems: Collect and store rainwater for irrigation, reducing reliance on municipal water supplies.
Sustainable Energy Practices
- Solar-Powered Lighting: Illuminate your outdoor space with energy-efficient LED lights powered by solar panels.
- Solar Heating for Pools or Hot Tubs: Reduce energy costs by using solar power to heat water features.
- Wind-Powered Elements: Incorporate decorative wind turbines that can generate small amounts of electricity for outdoor use.
By integrating these sustainable practices, you not only create a more environmentally friendly space but also potentially reduce long-term maintenance costs and energy usage.
Conclusion: Envisioning Your Ideal Outdoor Living Space
Transforming your backyard into a functional and beautiful outdoor living space offers a multitude of benefits:
- Increased Home Value: Well-designed outdoor areas can significantly boost your property’s worth.
- Expanded Living Area: Extend your usable space without costly home additions.
- Health and Wellness: Enjoy the physical and mental health benefits of spending time outdoors.
- Entertainment Opportunities: Create the perfect setting for hosting gatherings and events.
- Personalized Leisure: Tailor your outdoor space to support your hobbies and interests.
- Aesthetic and Sustainable Design: Beautify your property while implementing eco-friendly practices.
As you envision your ideal outdoor living space, consider how you can incorporate elements that align with your lifestyle, enhance your property’s value, and contribute to your overall well-being. Whether you’re dreaming of a cozy reading nook, a bustling entertainment area, or a serene meditation garden, the possibilities for transforming your backyard are limitless.
By investing in outdoor living, you’re not just improving your home; you’re enhancing your quality of life. Take the time to plan thoughtfully, considering both your immediate desires and long-term needs. With creativity and careful design, your backyard can become a true extension of your home—a personal oasis that brings joy, relaxation, and countless memorable moments for years to come.
[Top]
Sustainable Gardening: Eco-Friendly Practices for Your Outdoor Space
Sustainable gardening is an approach to cultivating plants that focuses on environmental stewardship, resource conservation, and long-term ecological balance. It aims to create beautiful, productive outdoor spaces while minimizing negative impacts on the environment and maximizing benefits to local ecosystems. (more…)
[Top]Creating the Ultimate Backyard Oasis: Tips for Small Spaces
Transforming a small backyard into an ultimate oasis is not only possible but can be incredibly rewarding. With clever design and thoughtful planning, even the most limited spaces can become luxurious and functional retreats. This guide will walk you through creating your perfect backyard oasis for small spaces, proving that size doesn’t have to limit your outdoor living dreams. (more…)
[Top]How to Choose the Perfect Grill: Top 5 Tips and Tricks
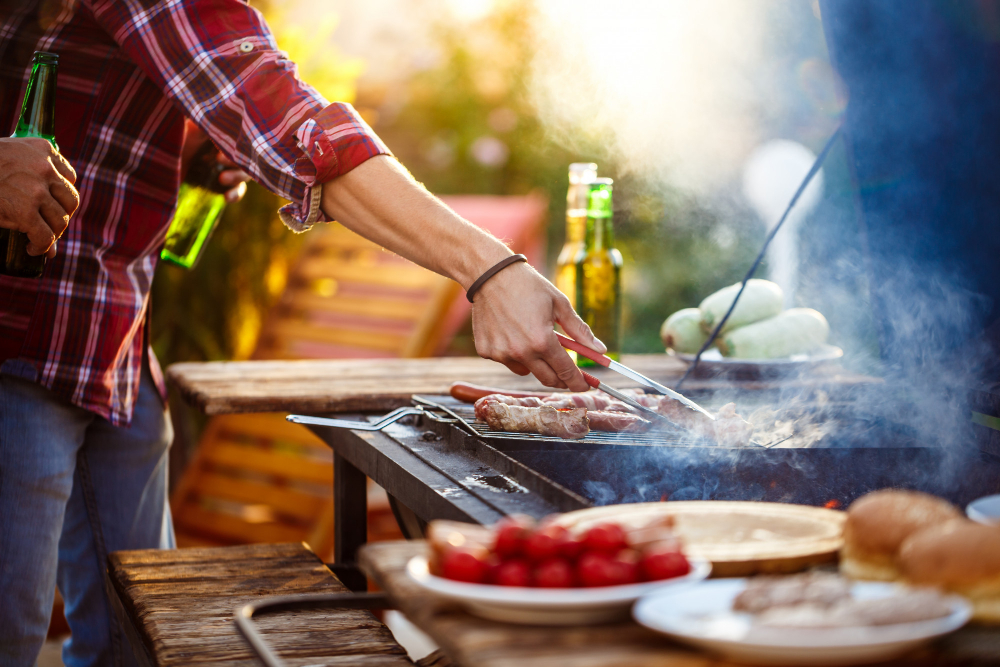
As the golden sun begins to shower its warm rays upon us and the days stretch out with the promise of laughter and camaraderie, it’s time to ignite the grill and prepare for some delectable outdoor feasts. However, with a myriad of grills beckoning from every corner, how can you determine which one will elevate your grilling escapades to heavenly heights?
Fret not, dear reader! In this article, we will not only guide you through our top 5 invaluable tips but also introduce you to some phenomenal brands like Weber that will ensure your grilling adventures are nothing short of extraordinary. So, let’s embark on a thrilling journey into the enticing realm of grills, delving into grills reviews that will transform your decision-making process into a delightful and effortless experience!
Determine Your Needs and Budget
Before diving headfirst into the world of grills, it’s crucial to first evaluate your personal requirements and establish a realistic budget. Take a moment to ponder how often you plan to partake in grilling escapades, the number of hungry mouths you’ll be satisfying, and the array of dishes you wish to whip up. Remember, grills span a broad spectrum, from budget-friendly options to lavish, high-end models.
For the occasional griller who relishes a laid-back weekend cookout, a basic charcoal or gas grill might just hit the sweet spot. However, if you’re a bona fide barbecue aficionado with a penchant for exploring diverse grilling techniques, you might find yourself drawn to a more adaptable and advanced grill, such as a Weber, which boasts an extensive selection of models designed to cater to every budget and preference.
Choose the Right Fuel Type
There are three main types of grills, each with its own unique set of advantages:
- Charcoal grills: These grills offer that classic, smoky flavor that barbecue lovers crave. They require a bit more skill and patience to master, but the end result is worth it. Charcoal grills are generally more affordable than their gas or electric counterparts.
- Gas grills: These grills provide convenience and ease of use, with quick heating times and simple temperature control. Gas grills are ideal for beginners and those who prioritize convenience over smoky flavor. They can be fueled by propane or natural gas.
- Electric grills: Ideal for people with limited outdoor space or strict fire regulations, electric grills are easy to use and maintain. While they might not offer the authentic BBQ experience, they’re perfect for apartment dwellers or those who want a hassle-free grilling option.
Consider Size and Portability
When it comes to selecting the ideal grill, size and portability play a significant role. Grills are available in a vast array of sizes, ranging from compact, easily transportable models to large, built-in outdoor kitchen setups. Reflect on the space you have at your disposal for your grill and whether you’ll need the flexibility to move it between different locations. If your outdoor area is limited or you plan to take your grill on camping trips, a portable model would be the way to go. Conversely, if you’re blessed with ample outdoor space and envision a permanent grilling station, you may want to invest in a built-in grill or a more sizable freestanding option.
Look for Quality and Features
When it comes to grills, quality matters. A well-constructed grill will not only last longer but also provide better performance. Look for grills made from durable materials like stainless steel or cast iron, and pay attention to the thickness and quality of the grates. A grill with a reliable ignition system, even heat distribution, and precise temperature control is worth the investment.
Additionally, consider the features you want in a grill. Some grills come with extra bells and whistles like side burners, rotisseries, or built-in thermometers. While these features can be convenient, they might not be necessary for your needs, so prioritize what matters most to you.
Read Grills Reviews and Recommendations
Prior to settling on your grill of choice, it’s essential to immerse yourself in the wealth of grills reviews penned by fellow customers and industry experts. These reviews can offer invaluable insights into the performance, longevity, and user-friendliness of various grill models, empowering you to make an educated decision. Keep an eye out for reviews addressing specific concerns you might have, such as the ease of cleaning or the grill’s ability to retain heat effectively.
As you sift through the plethora of grills, don’t forget to consult recommendations from trusted sources like Consumer Reports, barbecue-centric blogs, or grilling forums. These platforms can provide a treasure trove of information on the most suitable grills for diverse needs and budgets. Weber, for instance, is a renowned and esteemed brand that consistently garners rave reviews for its exceptional quality, top-notch performance, and lasting durability.
Conclusion:
Embarking on the quest to find the ultimate grill may seem daunting, but armed with our top 5 tips and tricks, you’re well on your way to discovering the grill that will bring your culinary dreams to life. Keep in mind the importance of assessing your requirements and financial plan, selecting the ideal fuel type, weighing the dimensions and mobility of the grill, prioritizing quality and features, and diving deep into grills reviews and expert opinions.
By adhering to this guidance, you’ll be able to choose a grill that not only caters to your needs but also transforms grilling into a delightful, enjoyable, and scrumptious experience. So, grab those tongs, ignite that grill, and prepare to forge unforgettable memories with loved ones as you gather around a tantalizing, lip-smacking barbecue feast! Let the grilling begin!
So, grab your tongs, fire up that grill, and get ready to create unforgettable memories with family and friends around a mouth-watering BBQ feast! Happy grilling!
Weber Charcoal Grills
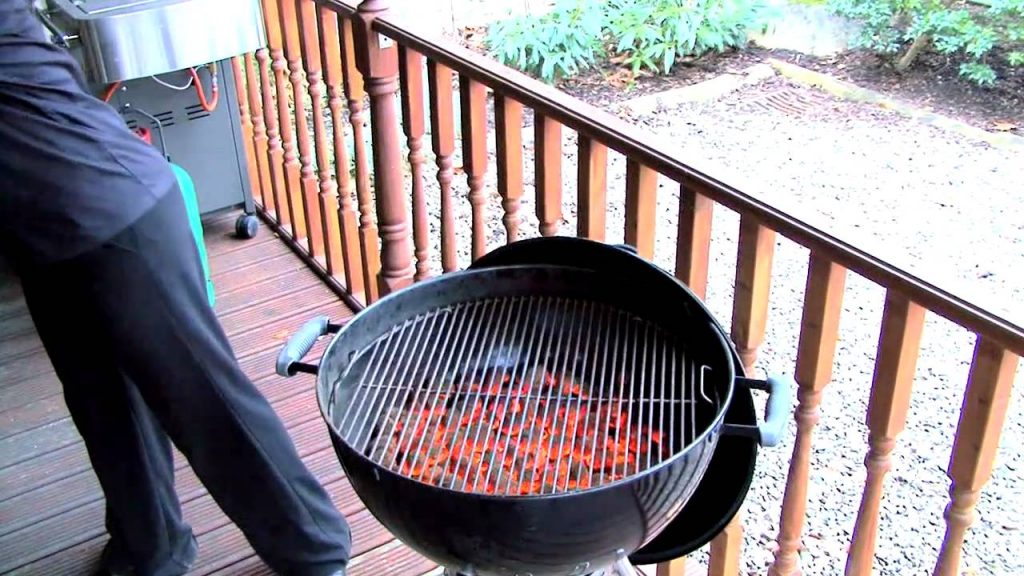
Weber Charcoal Grill has been a popular choice for so many years so we chose it as our featured outdoor charcoal grill. The secret is in the grill’s versatility. Unlike traditional outdoor barbecue grills, a Weber’s round shape and domed top create a reflective cooking surface that intensifies the heat of the charcoal fire. This allows the grill to create higher internal temperatures which, in turn, can quickly sear the food being cooked. The object in barbecuing a lot of foods is to sear the outside while the natural juices of the food remain within. A Weber Charcoal Grill does this especially well.
Another advantage of Weber charcoal grills has over a tradition grill is room. The rounded shape creates more space inside the grill and that increased space means more room to cook. You can cook roasts and turkeys on a Weber with ease. You can also cook more food, period. Since the round shape radiates heat evenly, there are no “cold corners” or “hot spots” where food get over- or under-cooked. Finally, the rounded top and bottom of the grill, along with the placement of the vents, creates an induction within the grill. This means the hot air is circulated around the grill as cold air comes in through the bottom vents and hot air exist through the top vent. This circulation means even temperatures within the grill and these even temperatures mean evenly cooked food.
There are few products whose very shape becomes so iconic that the shape itself dominates the genre. For example, what image comes to mind when I say the words “barbecue grill”? For many people, these two words conjure up a picture of a round object on a tripod base with a domed cover. In the mind of the buying public, a generic term, in this case barbecue grill, has come to mean a single product – the Weber Charcoal Grill. That’s a pretty amazing when you think about it. In this case though, the association is justified. The Weber Charcoal Grill has become synonymous with barbecuing because it is an amazing grill.
Back in the 1950’s. all outdoor barbecue grills were the same. A grill was a flat square object supported on four legs. The coals went in a single layer on the bottom. The grill went on top of the coals, nearly touching them. The flat grill top went on over everything else. That was it. You could grill up hot dogs, burgers and maybe steaks and chops, but that was all.
You couldn’t really control the heat of the fire or the height of the grill from the fire and the function of the grill top was to prevent the inevitable incineration of the food from happening too quickly. This type of grill was really only a mass produced brazier and braziers had been mankind’s “barbecue grill” for ages. Sure, it was convenient, in terms of having a place to start controlled cooking fire out doors, but in terms of food quality, it was a joke.
In 1952, a guy by the name of George Stephen, Sr. got fed up up with the barbecue status quo. George worked for Weber Brothers Metal Works, a company that manufactured marine buoys. He took one of the company’s buoys, cut it in half and fashioned a domed top for a cover. The Weber Charcoal Grill was born. George started making these grills for his neighbors, and the for the neighbor’s neighbors. Soon, supply couldn’t keep up with demand. In short order, the Weber Charcoal Grill became THE outdoor grill for the discriminating barbecue chef.
Today, the Weber remains the King of the Grill world. If you’ve never cooked on one, do yourself a favor. Pick up a Weber Charcoal Grill today and see how innovation can result in better tasting food.
[Top]Grilling Chicken – Barbecue The Best Bird!
Grilling Chicken is a great choice for the recipes for the grill. The one sure sign that the weather is getting warmer and that summer is around the corner is the sight and smell of barbecued food. You can be sure on the first nice day of spring the local store will see a run on charcoal briquettes, the guy next door will be cleaning off his grill and the whole neighborhood will be filled with the delectable smell of barbecue. One of the perennial favorites for barbecue cooking is chicken and why not? Grilling chicken is easy, it’s versatile and it’s good for you to boot!
When grilling chicken, the first thing to remember is food safety. Raw chicken can contain many food pathogens that can make you and your family very sick, so it’s important to follow a few simple rules.
1. Clean and prepare the chicken on a single washable surface.
2. Always thoroughly clean this surface after the prep work is done.
3. Remember to wash your hands and any utensils used on the chicken before you move on to prepare any other food items.
4. Being careful and taking the time to follow these simple rules will guarantee that your barbecue guests will remain healthy and happy, and that you’ll be grilling chicken for a long time to come!
One of the great advantages of grilling chicken is its versatility. There are literally dozens of ways to prepare chicken for the grill. The key word here is preparation, because chicken marinates so easily, so wonderfully and in so many ways. One of the simplest marinades for chicken is olive oil, vinegar and garlic. Simply place cut up chicken pieces in a large Ziploc bag, add one cup of good quality olive oil, an eighth of a cup of vinegar and four or five cloves of garlic. Next, seal the bag and vigorously shake all the ingredients together. Finally, place the bag in the refrigerator for a minimum of three hours or, preferably, overnight. The chicken you grill the next day will be moist and flavorful – the best you’ve ever had!
Another way of grilling chicken is the beer can method. Beer can chicken? Definitely! You take a whole fryer chicken and wash it inside and out with cold water. Pat the chicken dry and season it to taste, again inside and out. (Rosemary and lemon pepper are a particularly great combo.) Next, take an empty beer can that has been thoroughly washed out and place the can inside the body cavity of the chicken. (Don’t worry if it’s not a perfect fit.) Place the beer can chicken over a moderately hot fire and grill for approximately 40 minutes, occasionally turning, until done. (You may find that this is the perfect time to empty another beer can or two in preparation for your next barbecue.) Take the chicken off the grill and serve promptly. (Remember to remove the beer can from the body cavity first!) It’s guaranteed this will be the juiciest, moistest bird you have ever enjoyed.
So, this barbecue season when you fire up the old grill remember that when you’re grilling chicken you’re grilling right.
[Top]Grilling Ribs – The Secret to a Successful Barbecue
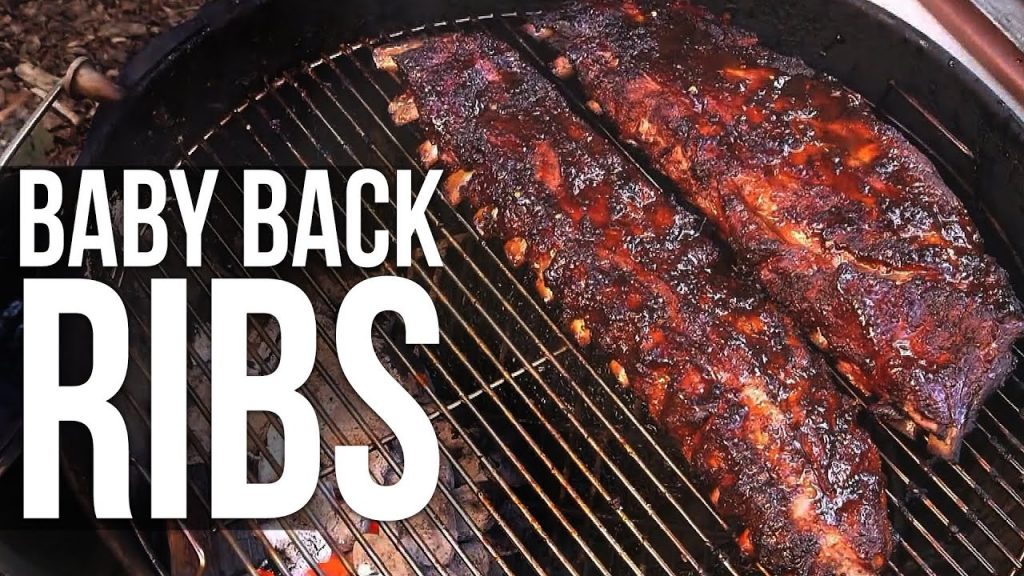
Grilling Ribs is a favorite to the recipes of the grill. Is there any one word in the culinary lexicon that evokes so much happiness, controversy and memories? In a lot of ways, ribs are barbecue. They are where barbecue began. (The word barbecue comes from the French phrase “barbe a queue”, meaning “whiskers to tail” and hearkens back to the days when a cook-out meant cooking a whole pig, including the ribs, outdoors over hot coals). They are, for many people, where barbecue ends. Depending on where you come from, ribs could be pork or beef or even mutton! They could also be finished with a vinegar based sauce or a tomato based sauce or even not sauced at all. However, no matter where you come from, one thing is sure – the best ribs are cooked low and slow. This means the meat was cooked for a long time at a lower temperature. In this article, you’re going to learn this “low and slow” method so that the next time you’re grilling ribs, you’re grilling them right.
The first step when grilling ribs is to decide what kind of ribs you want to grill. There are a lot of choices which range from the type of meat to the type of ribs. One way to simplify the process is to go with pork and to choose a cut know as the spareribs. Pork spareribs are meaty, tender and generally available. Because they tend to cook evenly when treated right, they are a good choice for the beginning outdoor chef. When you get your spareribs home, rinse them with cold water, pat them dry and season them to taste. This seasoning, also known as a “rub”, can be any combination of flavorings, herbs and spices you care to use. A good rub is key when grilling ribs. Simply sprinkle your seasonings onto the ribs and, using a good amount of pressure, “rub” them in.
The next step in grilling ribs is setting up the grill. If you’re using charcoal (and you should), you want to start with a moderate amount of coals placed to one side of the grill bottom. Next to the coals place a foil pan. When the coals have ashed over, put on the grill itself and place your ribs over the foil pan. Next to the ribs, place another foil pan full of water. Why do it this way? Putting the coals off to one side, as well as not putting the ribs over coals, slows down the cooking process by indirectly grilling the meat. The foil pan next to the coals catches any drippings from the ribs, keeping them off the coals and prevents the coals from flaring up. Finally, the water in the foil pan next to the ribs will evaporate in the heat of the grill. This steam will help to keep the ribs moist during the time they are on the barbecue. So that’s it. Cover the grill and sit back. Enjoy your favorite cold beverage. You are now the pit master and, as master of your own pit, it is your job to keep the grilling ribs “low and slow” by occasionally replenishing the coals or the water in the grill as needed.
The final step in grilling ribs is the finish or the sauce. The ribs will be done when the meat is separating from the bone. (If you’ve done everything right, this will be three to four hours after you first put the ribs on the grill.) Now all you have to do is decide on the finish. There are a lot of good commercially prepared barbecue sauces out there. Choose one that matches your taste and apply it to the ribs just prior to removing them from the grill. Don’t leave the finished ribs on the grill. The sugars in the sauce caramelize and burn very quickly and will make your hours of effort at the pit a waste.
Remember, low and slow is the only way to go when you’re grilling ribs.
[Top]Grilling Vegetables
Grilling Vegetables – The Healthy Barbecue Option
Grilling vegetables is a healthy alternative to the recipes for the grill. Everybody enjoys a barbecue! There are few things better than being outdoors with family and friends, enjoying the warm weather, while a grill full of delicious food cooks in the background. A healthy, and often overlooked, cookout alternative is to try grilled vegetables along with, or instead of, more traditional barbecue options. It turns out that, when properly prepared, grilled vegetables can be among the tastiest things you or your family and guests have tasted. The best part is that preparing vegetables for grilling couldn’t be easier.
The first step in preparing grilled vegetables is learning which types of vegetables are best suited for the barbecue. While nearly every variety of vegetable is capable of being grilled, some are better than others. In general, larger vegetables cook evenly and are easier to manage on the grill than smaller vegetables. Also, sturdier vegetables tend to handle the grilling process better than their more fragile counterparts. This means, for example, that bell peppers are a perfect choice for the barbecue, while broccoli is not. Other good choices include onions, zucchini or summer squash, and corn on the cob. Don’t forget to experiment, however. Sometimes, more exotic, lesser known, vegetables are perfect candidates for the grill. Radicchio and endive are delicious when grilled, as is fennel. In each case, the bitterness found in the raw plant is tempered by exposure to the flames.
The next step in making grilled vegetables is proper preparation. Start by slicing the vegetables to provide maximum exposure to the heat from the grill. You first want to remove all end pieces, pulp and seeds and then halve or quarter the vegetable in question. A rule of thumb is larger, regular sized pieces work better than smaller, irregular sized pieces. In addition, some vegetables, onions and mushrooms in particular, benefit from the use of a skewer. Always use stainless steel skewers. They are reusable and easier to manage. Stay away from bamboo skewers which tend to burn. Once the vegetables have been cleaned and sliced, place them in a large bowl of cold water for 30 minutes or so. This allows them to soak up a bit of water which will help prevent burning once they are on the grill.
Prelude LBM |
Premium LTE |
Premium Marine Grade LTE |
||
Grill Burners |
Stainless Steel Tube Burner |
Cast Stainless Steel Linear Burner |
4 Commercial Grade Cast Stainless Steel Burners |
|
Burner BTUs (per) |
14,000 |
14,000 |
14,000 |
|
Total BTUs |
42,000 (25″) |
56,000 (32″) |
56,000 |
|
Grill Grates |
8mm Round |
9mm Triangular |
9mm Triangular |
|
Ignition System |
Push & Turn Flame-Thrower w/ Backup Flashtube & Crossover Channels |
|
Flame Tamers |
14 gauge 443 Stainless Steel Full-Width Perforated Grids |
14 gauge 316L Stainless Steel Full-Width Perforated Grids |
|
Grease Management System |
Removable Drip Pan Baffles |
Removable Drip Pan Baffles with Perforated Flame Guard |
|
Zone Cooking |
443 Stainless Steel Removable Heat Zone Separators |
316L Stainless Steel Removable Heat Zone Separators |
|
While the vegetables are soaking, fire up your grill. Vegetables grill best over medium heat, so the key here is to prevent the grill from getting too hot. If you can hold your hand several inches off the grill for for three or four seconds, you’ve got the temperature just right. Take your vegetables out of the water, pat them dry, give them a quick brush of olive oil and place them on the grill. Not all of the vegetables will cook at the same rate, so be prepared to take different vegetables off the fire at different times. You want to lightly char the vegetables, but not burn them. When the side of the vegetable closest to the fire has browned and is marked by the grill, it’s time to turn it over. Only turn the vegetables once. When the other side is also browned and marked by the grill, that vegetable is done and it’s time to take it off. Grilled vegetables taste best at or just above room temperature, so serving is easy. Simply place all the grilled vegetables in the same bowl or on the same plate and let them cool for ten or fifteen minutes.
Grilled vegetables are easy once you know the tricks. Remember, when you’re grilling vegetables, you’re grilling smart.
[Top]Outdoor Gas Grills – A Smart Choice For Outdoor Barbecue Grills
Outdoor gas grills offer everything, and can do everything, that a charcoal grill can do and more. Outdoor gas grills run on liquid propane. Liquid propane is basically regular old natural gas under pressure. The advantages of burning propane are many, but the main one is…(wait for it)…no charcoal! Yup no hassle, no mess, no waiting and no ashy clean up. Outdoor gas grills are ready to cook when you are. All you do is turn on the gas, hit the ignition button and voila! You’re ready to get grilling. Why? Because liquid propane is a very efficient heat producer, much more so than mean, old charcoal. Outdoor gas grills are at grilling temperature about five minutes after you light them. Uber-convenient, no? Also outdoor gas grills come with at least two burner controls. This means you can easily turn the heat up on one side of the grill while keeping a more even heat on the other side. Try doing that on a charcoal grill without an asbestos glove. Oh and did I mention, no ash?
The first thing to decide is charcoal or no charcoal. The charcoal grill has many advocates and its list of defenders is long. However a charcoal grill has one major problem – charcoal. (Oh, and lighter fluid and while we’re at it where did I put those matches?) The problem with charcoal grills is that they need charcoal to work. Charcoal that is heavy. Charcoal that is messy. Charcoal that you never have enough of just when you’re ready to grill. (Not to mention lighter fluid and matches…again.) Even if you do have enough of everything you need to get the fire going, you still have to wait for the coals to get hot, you have to move the coals around if you’re cooking more than one thing at a time and after you’re done what have you got? A grill full of ashes. Yeah, yeah I know that incinerating lighter fluid is one of the smells that brings back childhood memories, but how many things does a responsible adult buy based solely on smell? No charcoal. Let’s move on.
Brahma | Angus | |
---|---|---|
Burner | Cast Stainless Steel |
Cast Stainless Steel |
Burner Warranty | Lifetime | Lifetime |
# of Burners | 5 | 4 |
Grilling Surface BTU’s | 75,000 | 60,000 |
Main Grilling Area | 760 sq. in. | 600 sq. in. |
Rear Infrared Burner / Rotisserie | Yes | Yes |
Intergrated Double Side Burner |
No | No |
Internal Lights | Yes | Yes |
Finally, outdoor gas grills are really, really efficient. A tank of liquid propane will last the average outdoor chef an entire summer. Even the most maniacal flame junkie won’t run out for 4 to 6 weeks. Plus, propane is environmentally friendly. You are reusing and recycling the propane tank every time you get a refill, you’re saving trees (charcoal is made of compressed sawdust, sawdust is made of wood, wood comes from…you see where I’m going) and propane gives off way less carbon dioxide than charcoal. All the bunnies in the world will thank you!
See! Wasn’t that easy? Deciding to grill on outdoor gas grills really is a no-brainer.
[Top]